Creating a bootable USB flash drive for installing Windows. Create Live USB with UNetbootin
A bootable Windows USB stick is very easy to make. This article will describe three simple quick ways to create a bootable USB flash drive from a ready-made ISO image. All methods are free and popular, although there are simpler and more complex options among them, using different software. Also, all utilities are fully functional in Windows XP.
If you have a new laptop or computer, with BIOS UEFI, and the hard disk of which uses the GPT style of placing tables, then on such a computer you can also install Windows 7 using a different algorithm. Also, if the device, computer, laptop, netbook, etc. has a USB 2.0 port and USB 3, and you decide to install Windows 7 from a bootable USB flash drive to such a device, then undoubtedly you should connect the flash drive to USB 2.0 port because Windows 7 itself does not support USB port type 3, which are usually marked in blue.

If a bootable flash drive is connected via USB 3, then the attempt to install Windows 7 will end with the following error:
“A required optical drive driver was not found. If you have a flash drive, floppy disk, DVD or CD with such driver, please insert this media. "
Creating a bootable USB drive
Now the first thing you will definitely need is an ISO image of the operating system. The second is the need to take care of the flash drive itself. Since this medium will undergo formatting, the data from the flash drive must be moved to a safe, secure place. It is also important to note that the volume of the flash drive must be strictly at least 4 gigabytes.It is imperative to check and make sure that a particular motherboard accurately supports loading such a plan (from a flash device).
- Creating a bootable USB flash drive by means (it is recommended in the last turn, since the method is not very effective);
- Creation through;
- Utility;
Creating a bootable USB stick with UNetBootin
You need to download the program and run it (the program is portable, works without installation).
It is necessary to check the item called ISO-image, and then select the letter of the USB drive.

The location of a specific image must be specified manually.

Next, click open.

Now just click OK.

There is a short process of copying system files to a USB flash drive.

After a short extraction of the necessary files, our bootable USB stick is completely ready.

Creating a bootable USB drive with UltraISO
A slightly tricky solution, in contrast to the above, is to use the program UltraISO... However, you can quickly understand the program by following the instructions. The functionality of the program is made in plain Russian, and the trial period of use under the license is completely functional and suitable for our purposes.
Next, you need to select the Russian language and download the program, which is very simple. Run as administrator, then select the trial period of use.

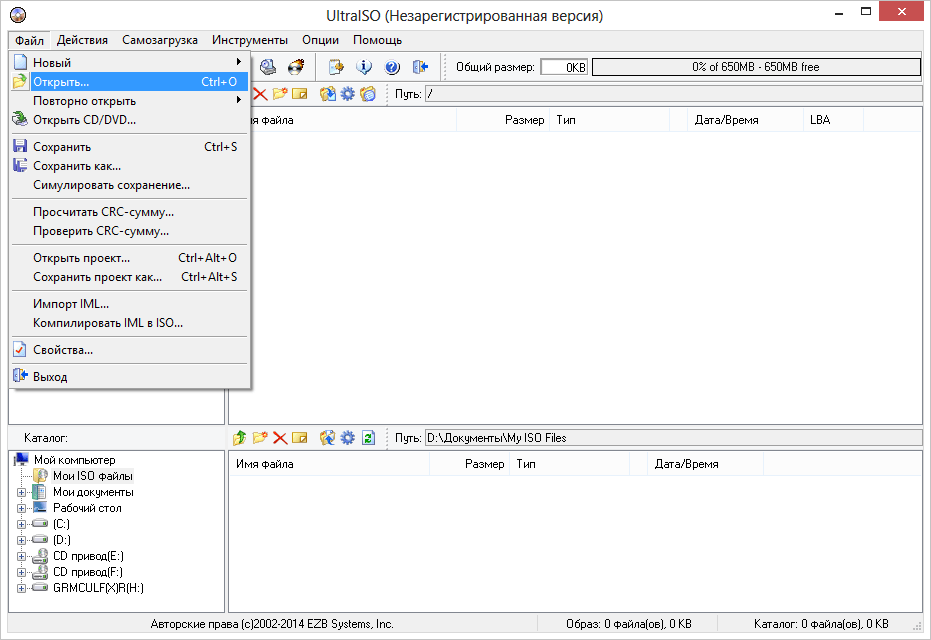
Before us is the usual program window.

The next step is to find our ISO image on your hard drive, which contains the operating system. It is worth recalling that such an image can be created by any other program, and then specified here. In the main UltraISO window, right-click on the file, and in the menu that opens, select the open option.

Next, we indicate our image with the system, in our case this is the Windows 8.1 image, which is located in the installation folder. Find the image for yourself and click open.

Also now you can put a USB flash drive into the socket of a netbook or laptop. You need to select the Bootstrapping menu in the main window of our program and click on the record of the hard disk image. The inserted USB flash drive should be present in this window.

Then we press to write down.

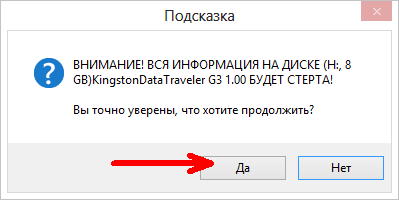
A hint will appear that your flash drive will be erased, we agree.

Next, we are waiting for the recording process to end.

Now you can carry our operating system in your pocket.
Today I want to tell you how you can easily create a Live USB using the UNetbootin program.
For those who do not quite understand why this is necessary, I will say that Live USB is a drive that connects to a computer via USB (in our case, this is a USB flash drive) on which an operating system is installed that runs from this media and does not require its installation on a hard drive ... Such flash drives can be used to get acquainted with the new operating system and its further installation. They can also be used to restore data or computer health. In addition, many people use Live USB as a portable operating system, which in some cases can really help out.
Due to some peculiarities of OS installation on a USB drive, it is easier to use special programs for these purposes, one of them is UNetbootin.
Installing UNetbootin
So, as always, first you need to install the program. Ubuntu users can do this directly from the standard repository with the command:
Sudo apt-get install unetbootin
For those who do not have this opportunity, go to the program website and select the desired platform right on the main page. UNetbootin is available for Windows Linux and Mac. Downloading. After downloading, launch the application.
UNetbootin requires an administrator password, enter and now you can start creating Live USB.
Create LiveUSB with UNetbootin
There is nothing complicated here. First of all, you need to select a distribution image.
The program can itself download the system image from the Internet. To do this, select the "Distribution" item at the top of the screen, then select the required distribution kit and its version.

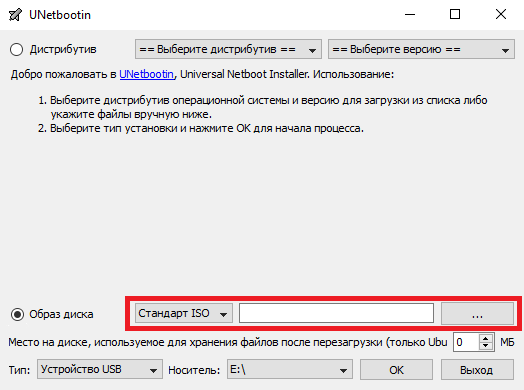
You can also create a Live USB from a pre-downloaded image. To do this, mark the item "Disk Image", then select the type of image, there is an option "Floppy" (you never know what) and "ISO". After that, you need to tell the program the path to our file.

Next, select the type of media. UNetbootin can install the system to both a flash drive and a hard drive. We choose a USB stick. After that, we select the medium itself, I have this flash drive / dev / sdb1. And now you can click "OK" - the creation of the Live USB will begin.


Upon completion, UNetbootin will offer to restart the computer so that we can boot into the newly created Live USB, or simply exit the application. Everything is up to you here.

Bootable flash drives will always come in handy. The computer has broken down, the OS is running slowly, you need to install Linux ... There are thousands of such situations, but there is only one solution. In this article, we'll take a look at how to make a bootable Linux USB stick.
Rufus is the most common and secure recording option. UltraISO is second behind it - in case of any problems, you should use it. Well, if he didn't help, then UNetBootIn will come to the rescue.
Rufus is a Windows program that allows you to create a bootable disk, including Linux. In order to create a bootable USB stick, first download Rufus. Now you need to download the required Linux distribution as an ISO image. After the download is complete, launch the program.
We leave all the parameters by default, just select the disk we need and instead of FreeDOS select the ISO image and indicate the path to it with the button to the right of the list. For example, an Ubuntu 16.04 installation would look like this:
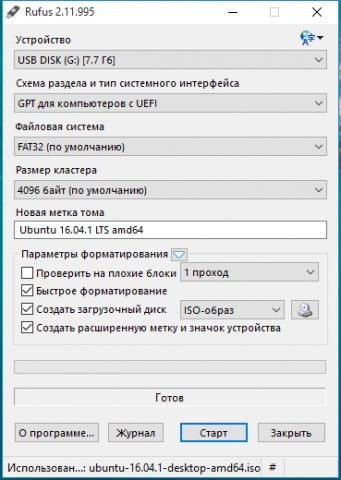
We press "Start". Everything! Now you have your own bootable USB stick. Read how to launch it below.
Making a bootable USB flash drive via UNetBootIn
UNetBootIn is a cross-platform application designed to create bootable disks for Linux distributions. You can download it.
There are two ways to create a bootable USB stick. The first is to select a distribution from the list above:

The second way is to download the image and select it in the field below:
After selection, click "OK". The installation of a bootable USB drive will go.
Important! It is better to download the ISO-image of the system yourself, otherwise the program does not guarantee its novelty and relevance!
Creating a bootable USB drive with UltraISO
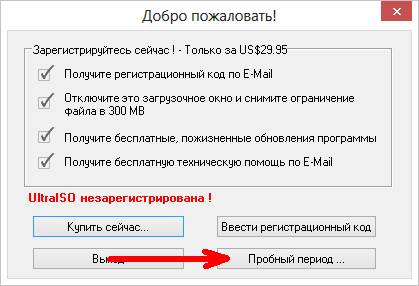
UltraISO is a paid program for working with ISO images. You can use the trial version of the program to create a bootable USB drive.
Download the program from the official website. After installation, we will choose to use a 30-day trial period.
Now let's open the pre-downloaded ISO image:
To create a bootable flash drive, you need to find the "Boot" menu and select the "Burn hard disk image" item in it:

Here we select the desired disk, and also select the USB-HDD + v2 recording method - it guarantees the operation of the flash drive in almost any BIOS:
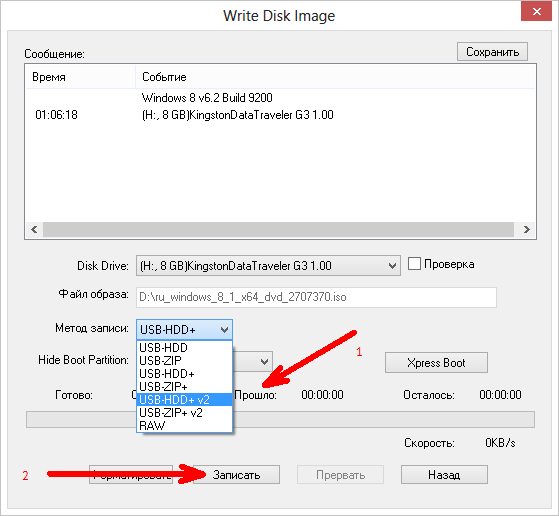
Click "Write". A warning will appear about formatting the flash drive. Click "OK".
Everything, the process has begun. We are waiting for the end of the recording.
How to boot from a USB flash drive via BIOS
To start the BIOS, use one of the following keys (listed in order of decreasing likelihood of activation).
- DELETE
Important! If you have a Lenovo laptop, try Fn + F12!

Today's users of personal computers and laptops are less likely to use external storage devices such as CDs and DVDs. It's probably not worth talking about their irrelevance, since they have long been replaced by flash drives, which, with their small size, can store several tens of gigabytes of information.
So, in order to write any operating system on your PC, it is enough to have a small USB flash drive with a virtual image of this very OS on it. To record these images, special utilities are used, one of which is the UNetBootin program.
A little about UNetBootin
UNetBootin is a cross-platform program that runs on Windows, Linux and Mac OS X. With this application, the user can write a virtual image of the Linux OS to any external storage device in order to use it later to install and further use this OS.
The main requirement for the correct recording of an ISO image using this utility is that the free space of the drive must exceed the size of the ported image.
Create an image
To get started, you need an external drive, downloaded UNetBootin program and the distribution kit of the operating system downloaded from the official site of the developers or from some other site you checked, if you want some special assembly.
In order to make a virtual image of the Linux operating system, you need to do the following:
- Open the UNetBootin program.
- Put a check mark next to the item Image.
- Click on the " … ”Next to the line and select the downloaded Linux distribution.
- At the very bottom of the window, the program in paragraph Type of put value USB disk, and in paragraph Disk- the path to the flash drive to which the image will be written.
- Click on OK.

After the performed actions, the UNetBootin utility will automatically start recording the image. You can watch the whole process through the program window.